BUILD
Make your own
electronic trainer.
TRAPPUNK uses a sensor-equipped touchscreen display and a simple stock. Tap the touchscreen to fire. No computer is needed during normal use.
What to check before buying
| Display | 3.49″, 640 × 172 |
| Sensor | QMI8658 on board |
| Controller | ESP32-S3 |
| Power | USB-C; optionally a suitable battery |
| Revision | V2 (Rev1.1) only. Ask the seller to confirm before buying. |
| SD card | Optional for export |
THE WAVESHARE BOARD

Waveshare product photo. Confirm the V2 (Rev1.1) board before buying.
DIY MAKER GUIDE
Cardboard ESP board holder
A practical, low-cost holder made from 3 mm cardboard. The English guide shows the 3.4 × 9.7 cm board opening, adjustable hand openings and step-by-step assembly.
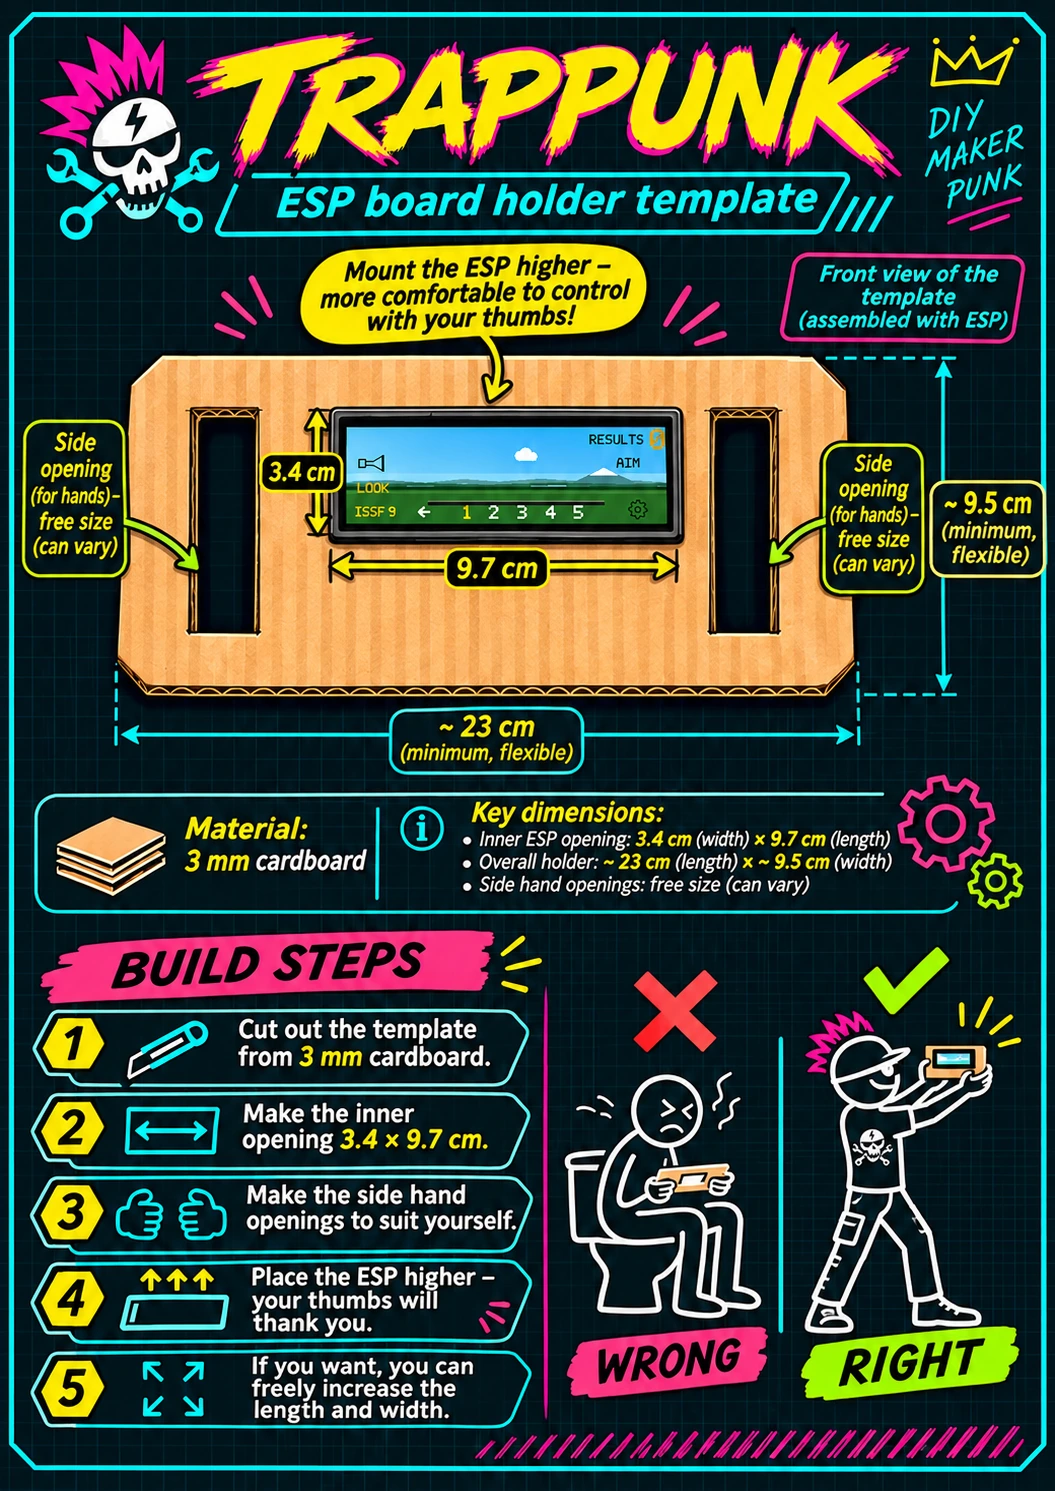
Tap the guide to view it at full resolution. This is an illustrated assembly guide, not a 1:1 printable cutting stencil. Measure the opening before cutting.
Core components
01 · THE BOARD
Waveshare ESP32-S3 Touch LCD 3.49B
640 × 172 IPS capacitive touchscreen, onboard QMI8658 6-axis sensor, ESP32-S3 and microSD functionality.
Waveshare product page ↗02 · SHOT CONTROL
Built-in touchscreen
Tap the ESP32 screen to fire. The capacitive touch panel provides comfortable and direct shot control.
03 · THE STOCK
Wood, cardboard or 3D print
A stable, comfortable holder for repeatable movement. The first working prototype uses a simple DIY approach.
What is still being prepared?
Verified V2 pin diagram, a documented stock, tested installation binaries and a beginner-friendly assembly walkthrough.